
needmorepower
No, seriously.
Inspired by this thread:
http://www.nloc.net/vbforum/gen-1-lightnings/208554-need-help-cab-mount.html
I decided to do a write-up with pictures to make the descriptions less confusing because I was having a hard time visualizing things, though Steve83's picture of the disassembled bushing was very helpful. I did this install on my daily driver '95 F-150 but the procedure is the same for the gen 1 Lightnings.
The replacement bushings are Energy Suspension part number 4.4107G for the black, graphite impregnated ones. You can install the red bushings if you'd like to, and the part number for those is 4.4107R. The kits also come with core support bushings, but I didn't change those.
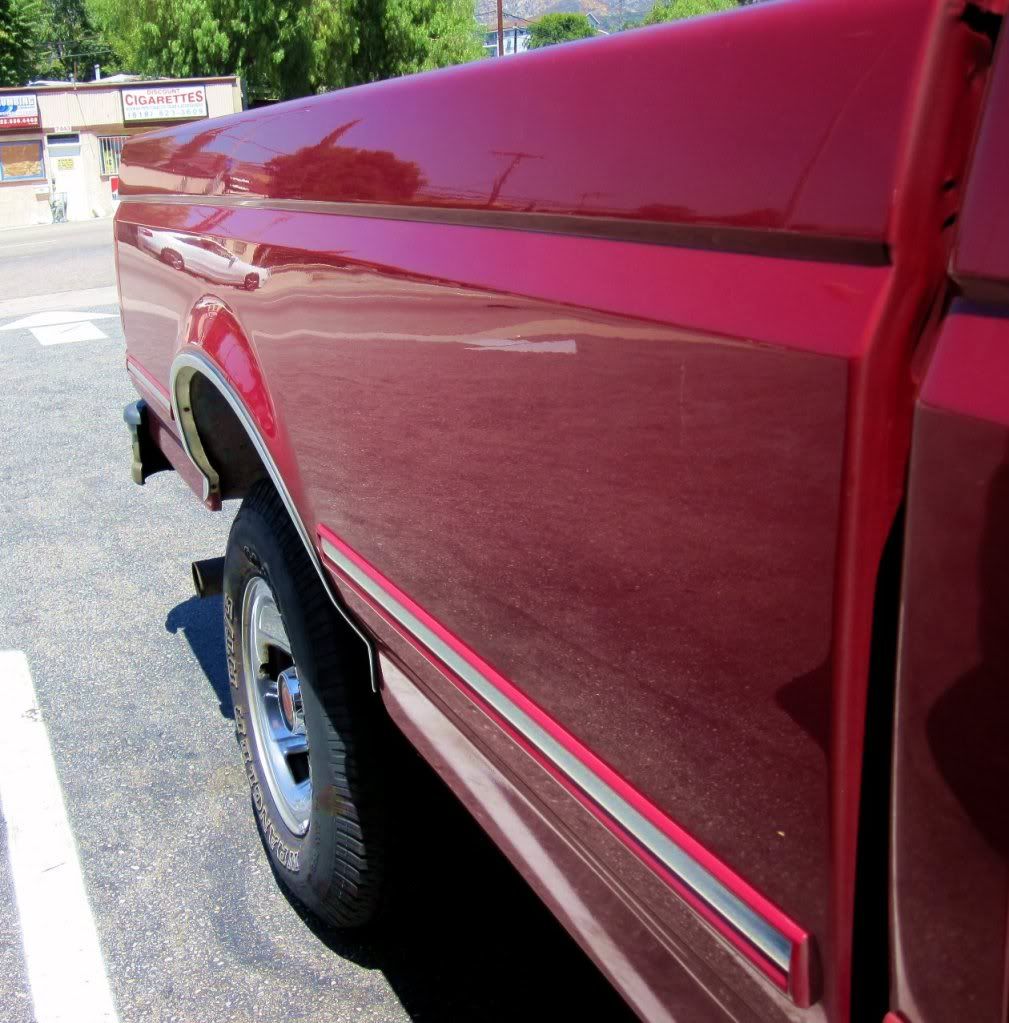
Here's the cab/bed alignment before replacement:
I had a helper for this whole project and in hindsight it's not a task I'd ever take on alone, but I'm not you, so do whatever you want.
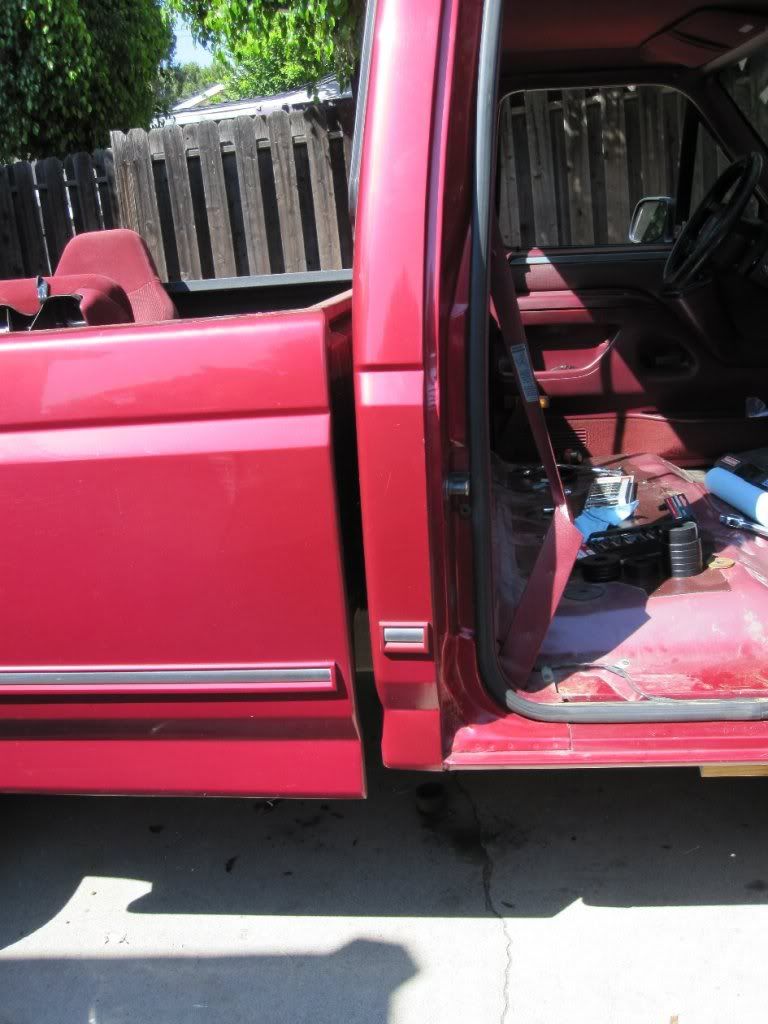
The sill plates and kick panels have to be removed for this, and you may want to pull the seats too, but you may not have to if you have an impact. I didn't have one and had to use a 2' breaker bar, so I pulled the seats and took the opportunity to pull the rug completely and hose it down at the local car wash, then let it dry on the fence while changing the bushings.
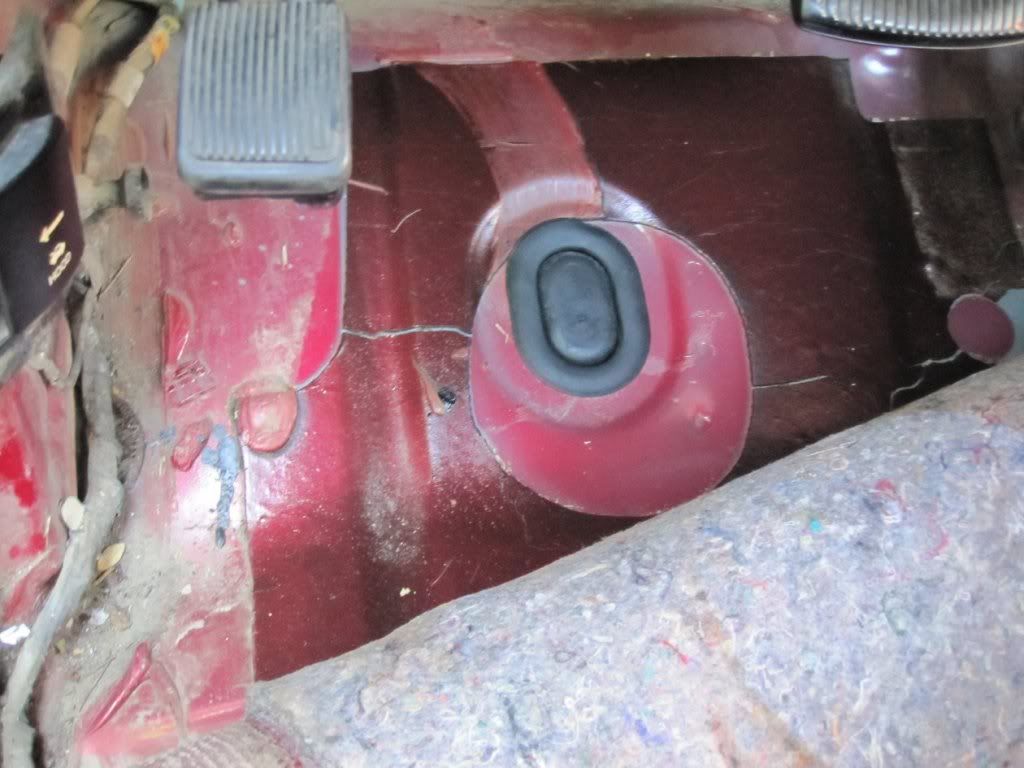
The front cab bolts are under the grommets:
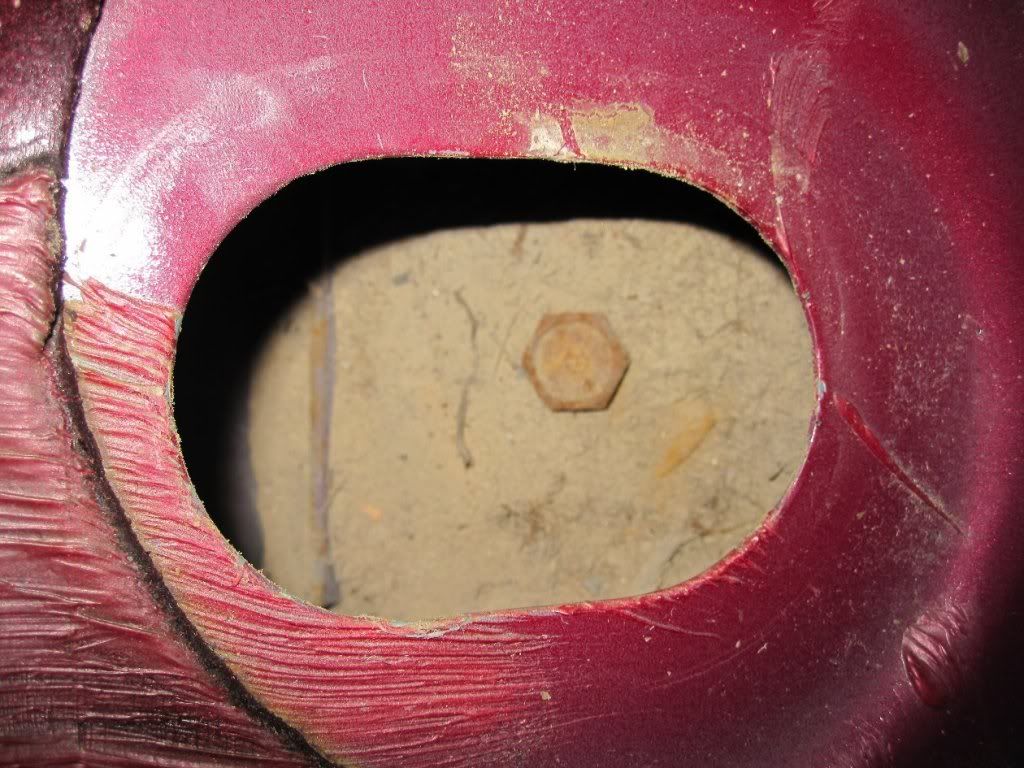
And might look like this:
I used a screwdriver to bust up the dirt and sucked it out with a shop vacuum, then let them all soak in penetrating fluid while I went and washed the rug.
I didn't apply any penetrating fluid to the bolts until the day of the replacement and my truck was driven on salted Canadian roads for 11 years, but don't let that make you think yours won't need to be soaked in advance. It took a long time to get the driver's side bolts loosened all the way with the breaker bar on top, and a wrench on the bottom by loosening until it got too tight, then tightening slightly, spraying the bolt under the cab with penetrating fluid to wash the rust off, then loosening until it got too tight again.
I had to un-bolt the front strap on the front fuel tank and just let it hang there to give better access to the nut on the driver's side rear bushing.
Once all 4 cab bolts are loosened off so that the bolt is barely sticking out the bottom of the nut like this:
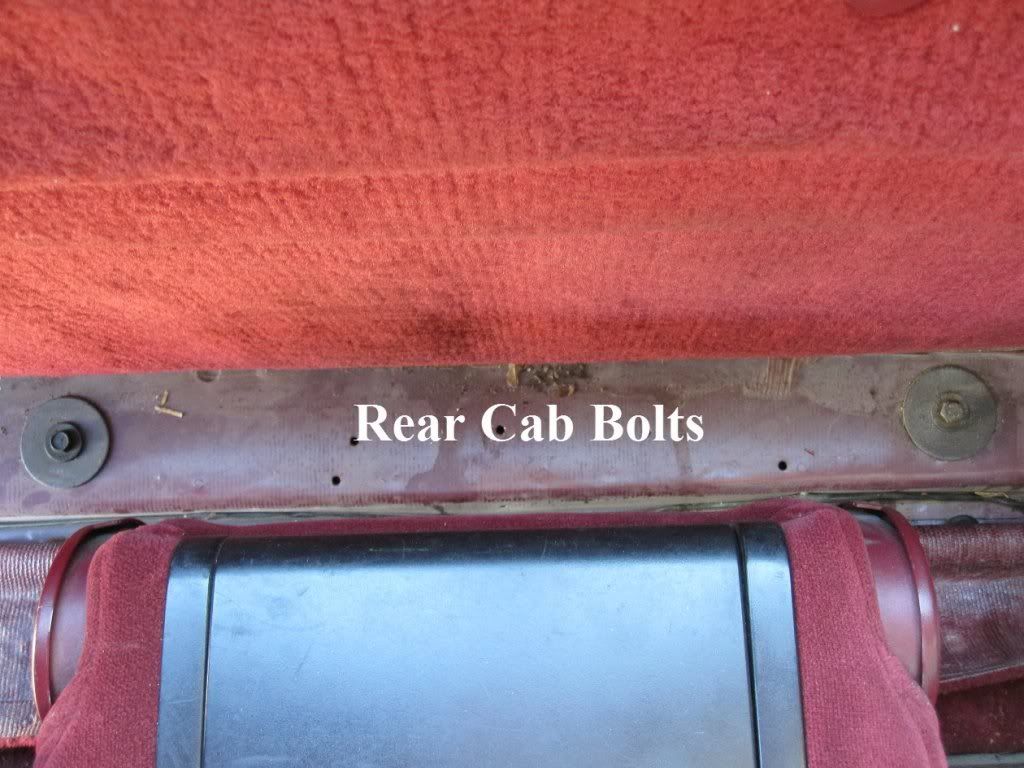
The rear cab bolts will look like this:
And you can then take a BFH and pound it down with 4 or 5 good whacks to separate the two sleeves in the bushing.
For the front I removed the bushing bolt and made a puller out of it like this:
Instead of really large washers (which I didn't have) I drilled a 1/2" hole through the middle of a piece of 2X4. If I'd used a 1X4 instead of a 2X4 I wouldn't have had to cut 1" off the coupling. By the way, the coupling is a hair too large to fit at first glance, but move it around and tap it with your fist and it will go in. It works like a charm and only cost $2.
The end result looks like this:
Once you have both bushings separated on one side of the cab you can jack that side up. I did it this way, and yes, that's a Chevy jack I used :hide::

I found that when you jack in the middle of the cab, the rear lifts higher than the front, so I had to re-position it about 6"-8" from the front cab corner and that way, once I had it high enough to get the front bushing out, it was also high enough to get the rear one out.
To give you an idea how high you'll have to jack it:
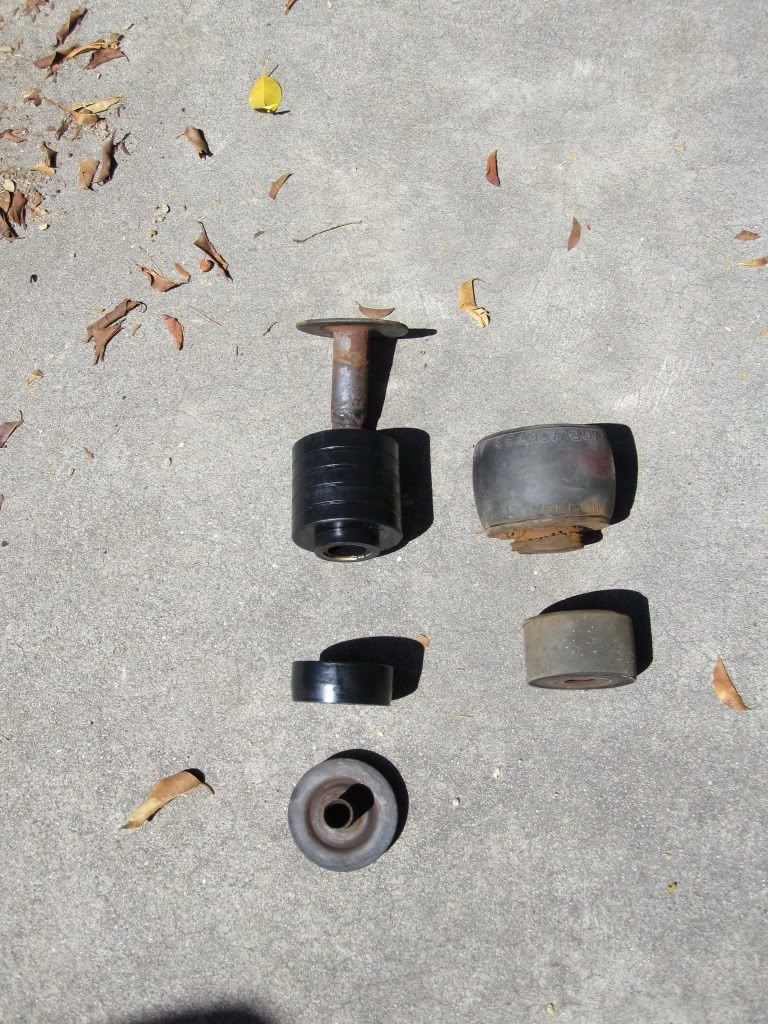
Once it's up there you can pull out the stock bushings, swap the sleeves over to the new bushings and put them back in.

Put the bolts back in through the new bushings and start them in the nuts so they're just barely sticking out of the nut again, leaving them loose, and repeat the bushing replacement procedure on the other side of the cab.
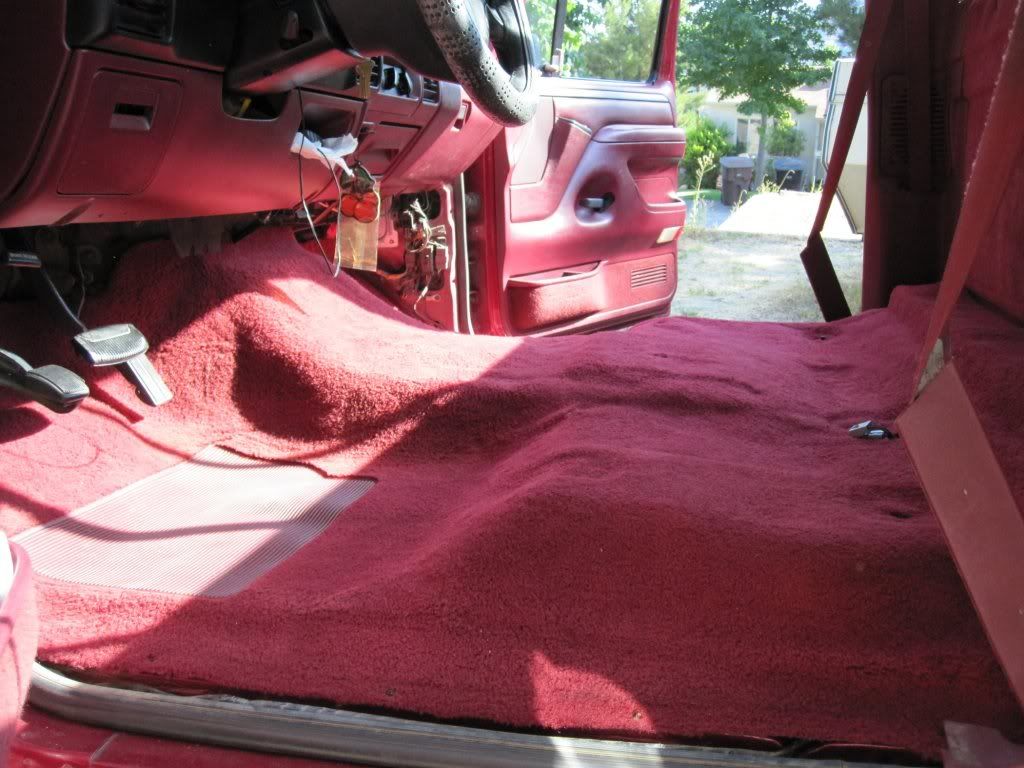
When all 4 bushings are done and bolts are back in but still loose, check for bed to cab alignment because the cab may shift to one side on you like mine did, then tighten the bolts down and put your spanky clean rug back in. It was about 90% dry already from this sunny and warm California weather after just a few hours:
Notice anything missing from the picture?
I snapped the driver's side rear seat stud, so I'll have my helper friend weld a nut onto the bottom of it another day and pull it out from the bottom.
That's pretty much it, aside from re-assembling the interior, but be sure to go for a drive and test out your new bushings (click image for video):

I did notice an increase in road feel from the harder polyurethane bushings, but not enough to bother me. I also feel less cab movement (body roll) when cornering hard.
I forgot to take an "after" picture of the bed/cab alignment but you can probably see it in the video above. The cab is now slightly higher than the bed, but one washer under the front of the bed bolts will take care of that if I ever feel like doing it, which I probably won't because it's really close and not easily noticed.
I hope that helps somebody.
"And remember, if the women don't find you handsome, they should at least find you handy." - Red Greenldtu:
http://www.nloc.net/vbforum/gen-1-lightnings/208554-need-help-cab-mount.html
I decided to do a write-up with pictures to make the descriptions less confusing because I was having a hard time visualizing things, though Steve83's picture of the disassembled bushing was very helpful. I did this install on my daily driver '95 F-150 but the procedure is the same for the gen 1 Lightnings.
The replacement bushings are Energy Suspension part number 4.4107G for the black, graphite impregnated ones. You can install the red bushings if you'd like to, and the part number for those is 4.4107R. The kits also come with core support bushings, but I didn't change those.
Here's the cab/bed alignment before replacement:
I had a helper for this whole project and in hindsight it's not a task I'd ever take on alone, but I'm not you, so do whatever you want.
The sill plates and kick panels have to be removed for this, and you may want to pull the seats too, but you may not have to if you have an impact. I didn't have one and had to use a 2' breaker bar, so I pulled the seats and took the opportunity to pull the rug completely and hose it down at the local car wash, then let it dry on the fence while changing the bushings.
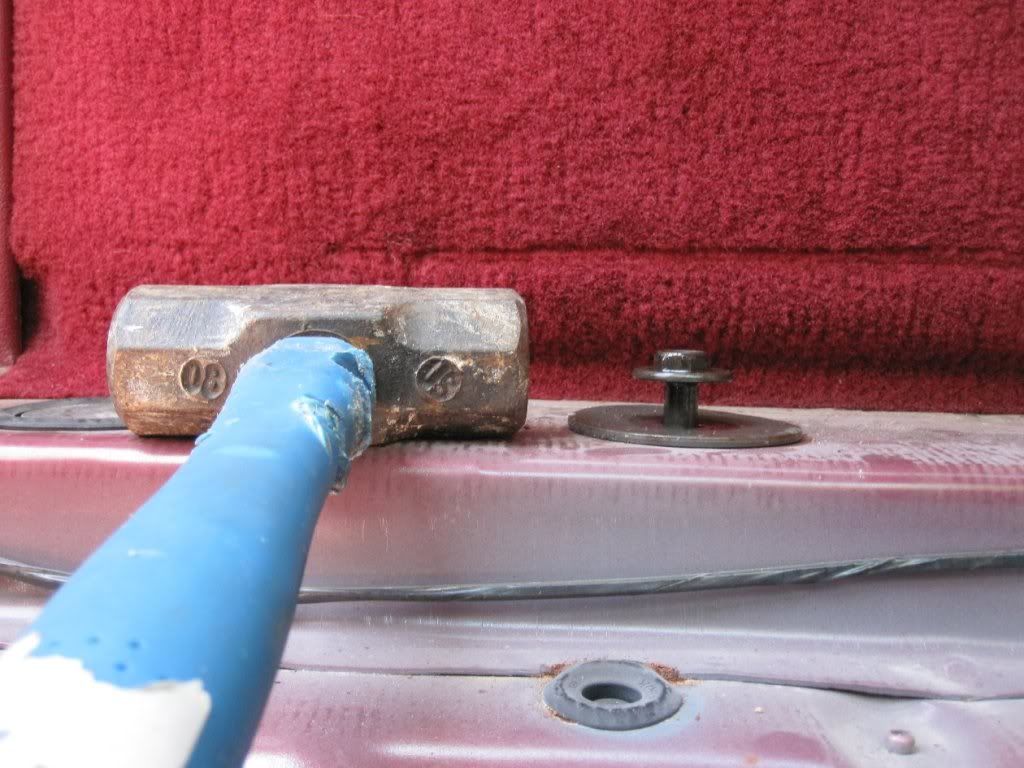
The front cab bolts are under the grommets:
And might look like this:
I used a screwdriver to bust up the dirt and sucked it out with a shop vacuum, then let them all soak in penetrating fluid while I went and washed the rug.
I didn't apply any penetrating fluid to the bolts until the day of the replacement and my truck was driven on salted Canadian roads for 11 years, but don't let that make you think yours won't need to be soaked in advance. It took a long time to get the driver's side bolts loosened all the way with the breaker bar on top, and a wrench on the bottom by loosening until it got too tight, then tightening slightly, spraying the bolt under the cab with penetrating fluid to wash the rust off, then loosening until it got too tight again.
I had to un-bolt the front strap on the front fuel tank and just let it hang there to give better access to the nut on the driver's side rear bushing.
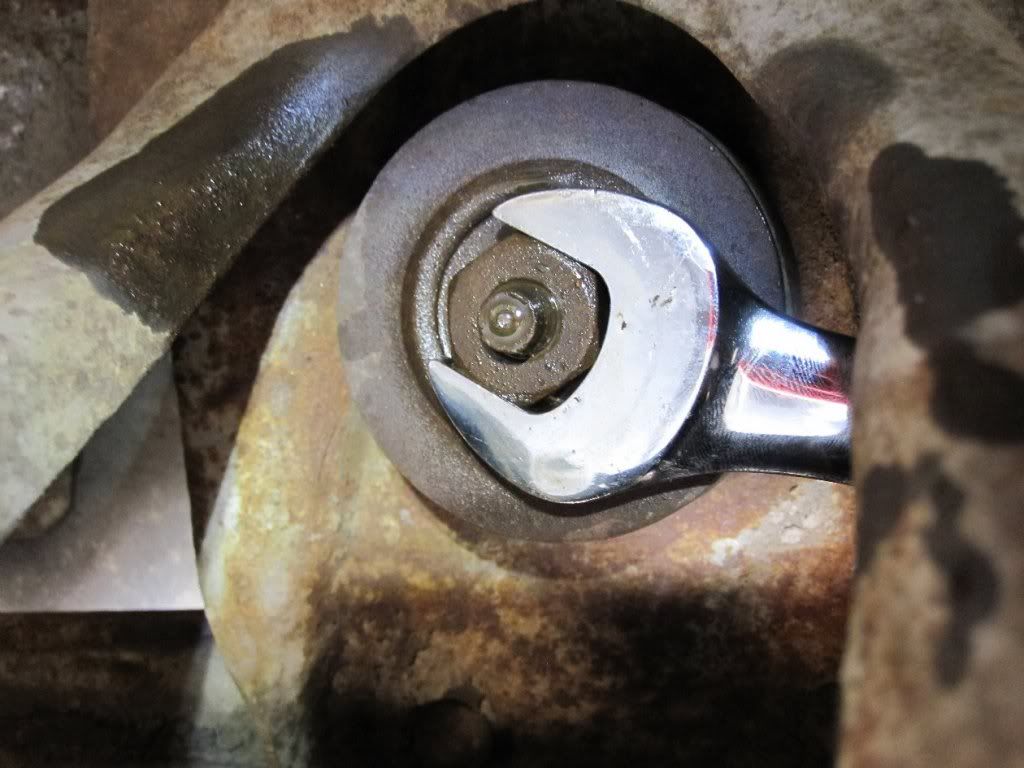
Once all 4 cab bolts are loosened off so that the bolt is barely sticking out the bottom of the nut like this:
The rear cab bolts will look like this:
And you can then take a BFH and pound it down with 4 or 5 good whacks to separate the two sleeves in the bushing.
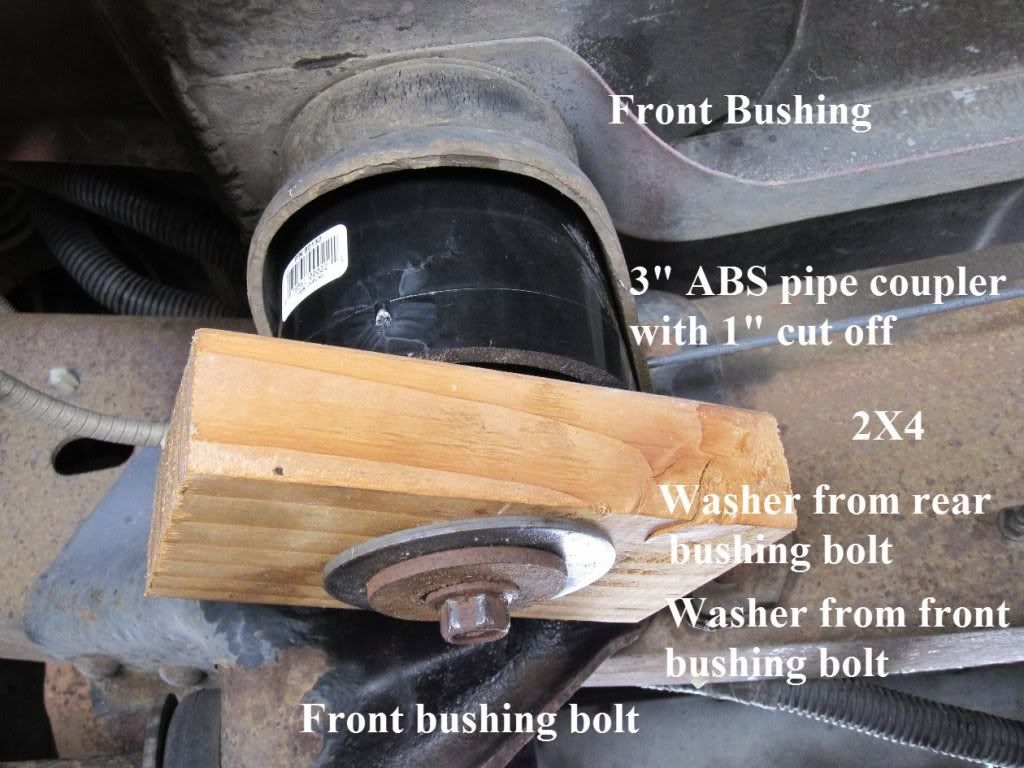
For the front I removed the bushing bolt and made a puller out of it like this:
Instead of really large washers (which I didn't have) I drilled a 1/2" hole through the middle of a piece of 2X4. If I'd used a 1X4 instead of a 2X4 I wouldn't have had to cut 1" off the coupling. By the way, the coupling is a hair too large to fit at first glance, but move it around and tap it with your fist and it will go in. It works like a charm and only cost $2.
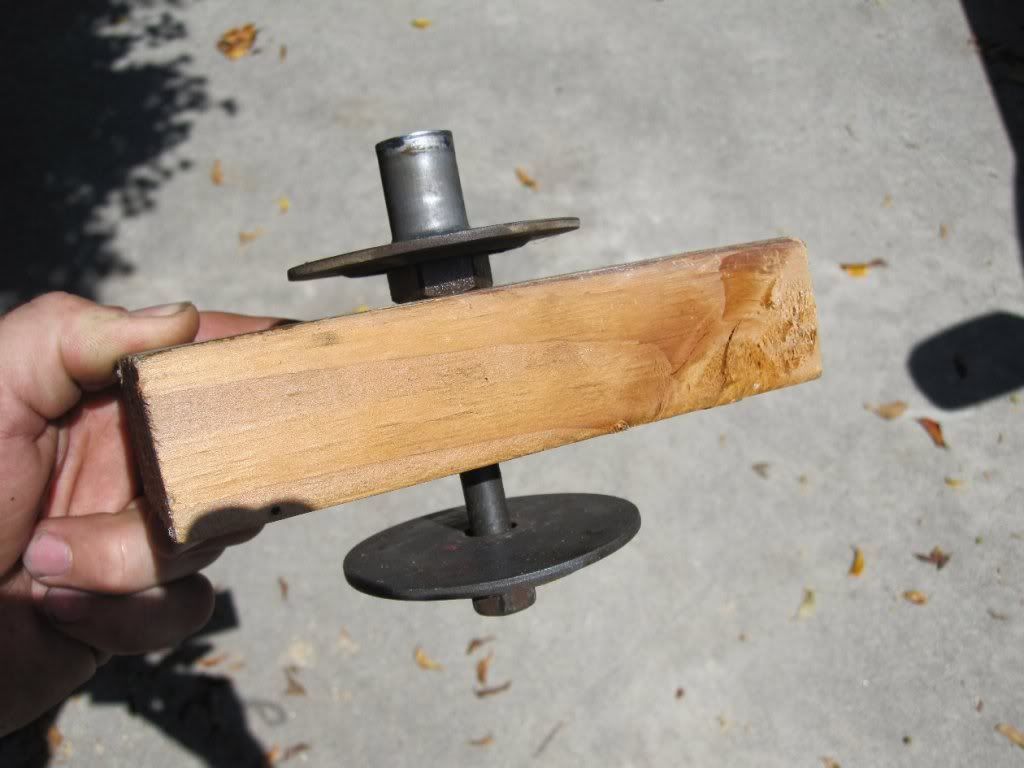
The end result looks like this:
Once you have both bushings separated on one side of the cab you can jack that side up. I did it this way, and yes, that's a Chevy jack I used :hide::
I found that when you jack in the middle of the cab, the rear lifts higher than the front, so I had to re-position it about 6"-8" from the front cab corner and that way, once I had it high enough to get the front bushing out, it was also high enough to get the rear one out.
To give you an idea how high you'll have to jack it:
Once it's up there you can pull out the stock bushings, swap the sleeves over to the new bushings and put them back in.
Put the bolts back in through the new bushings and start them in the nuts so they're just barely sticking out of the nut again, leaving them loose, and repeat the bushing replacement procedure on the other side of the cab.
When all 4 bushings are done and bolts are back in but still loose, check for bed to cab alignment because the cab may shift to one side on you like mine did, then tighten the bolts down and put your spanky clean rug back in. It was about 90% dry already from this sunny and warm California weather after just a few hours:
Notice anything missing from the picture?
I snapped the driver's side rear seat stud, so I'll have my helper friend weld a nut onto the bottom of it another day and pull it out from the bottom.
That's pretty much it, aside from re-assembling the interior, but be sure to go for a drive and test out your new bushings (click image for video):
I did notice an increase in road feel from the harder polyurethane bushings, but not enough to bother me. I also feel less cab movement (body roll) when cornering hard.
I forgot to take an "after" picture of the bed/cab alignment but you can probably see it in the video above. The cab is now slightly higher than the bed, but one washer under the front of the bed bolts will take care of that if I ever feel like doing it, which I probably won't because it's really close and not easily noticed.
I hope that helps somebody.
"And remember, if the women don't find you handsome, they should at least find you handy." - Red Green
ldtu:
Last edited: