Upgrades for #772

All those years I ran 15 psi on my black truck with no intercooler then I sold the long block to Justin DiPalma and he ran it for years as well. It eventually made into his daily driver and if my memory serves me correctly it’s still in there running.

You can’t get greedy with timing on pump gas and if you’re going to run lots of timing you have to put race gas in.

 
Nice! I don’t know what the highest boost is on this pulley combo, but was told that it made 10psi on the last stroker motor it was on. Most definitely going to re configure the ignition table to -2° per lb of boost and go down from there. Currently it’s pulling 1psi. Also have to work on the VE table as it’s way rich at 10.5 AFR. Got to change to colder plugs and regap. Running .035 now which I don’t think will work at 6400 rpm with 10- 14psi.


Sent from my iPhone using Tapatalk
 
Also need your air charge temperatures. That has a big impact on how much timing you can run.

I personally wouldn't even contemplate anything above 10 psi without an intercooler.

Air temps were 154°.


Sent from my iPhone using Tapatalk
 
Haven’t updated in a while so here goes…

Got the timing issue figured out last weekend. Timing table switch was on in Tunerstudio which was enabling the change to timing table 3 at low tps voltage. This made all the changes to ignition Table1 void.

Had belt slip and a fuel issue afterward so had to stop tuning. Changed out the filter and installed the Quantum 340lph assembly and tightened the belt yesterday so plan on tuning today.

Adjusted pressures in the trans and is better but still slipping. Will be tackling that soon…


Sent from my iPhone using Tapatalk
 
Thought I had posted an install picture but guess not.. I’m still tuning as I ran into some issues with the quantum fuel pump install and a timing table issue on Tunerstudio but hot Al that straightened out now and took the old girl out for a romp last night for the first time in a month. Still have a slight detonation but further ignition table tuning will straighten that out. And if it stays warm enough, I plan to get it lined out this week.
 

Attachments

  • 337107B1-5800-48BF-AC46-A5175038E855.jpeg
    337107B1-5800-48BF-AC46-A5175038E855.jpeg
    239.7 KB · Views: 21
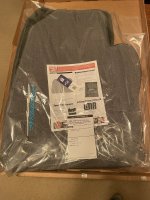
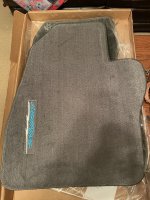
Finally in stock again. A nice after Christmas gift from my wife!
 

Attachments

  • D0017E21-DDAA-4F82-A9AD-32BA3E2962E9.jpeg
    D0017E21-DDAA-4F82-A9AD-32BA3E2962E9.jpeg
    246.2 KB · Views: 26
  • A226EAA7-11EF-4ACE-B7DC-B5BA7DD1C5B1.jpeg
    A226EAA7-11EF-4ACE-B7DC-B5BA7DD1C5B1.jpeg
    306.1 KB · Views: 26
Had a bad day last Thursday on the way home.

3a4c0e93853aeb82133d268552ee7572.jpg


Riding along around 80mph and all of a sudden she started popping and losing power. Shut it down and pulled over.. would turn over but wouldn’t fire off. Got it home and checked it out today. MSD coil has about 3500 miles on it gave out. Very dim spark at the coil and nothing at the coil. Bought a stock replacement coil and when diagnosing, also found a broken (aftermarket) rotor so replaced it as well with new MSD cap and rotor.

29a886d75791978161400f6468c96be7.jpg


Back up and tuning today. Getting closer but still got a little ways to go…


Sent from my iPhone using Tapatalk
 
Did you upgrade the wiring and add a relay to the fuel pump or just use the factory wiring? I have the same pump but haven’t installed it yet. Seems to me like it would draw more current than the stock pump.
 
Did you upgrade the wiring and add a relay to the fuel pump or just use the factory wiring? I have the same pump but haven’t installed it yet. Seems to me like it would draw more current than the stock pump.

Yes I did! Some have installed them without upgrading but I didn’t want to take a chance. I left the wire the same going through the original hat and soldered on either side. Let me see if I can dig up my post. It has all the info. Also you want to make sure you install the factory spacer between the fuel pump and the hat gasket. If not, it will fall down in the housing and you won’t have enough pressure. We had talked about this in another thread and I forgot about it during the install. As a result, I had to pull the tank and fix it before it would even move!


Sent from my iPhone using Tapatalk
 
Here is the write up for my original install. I have changed out the Aeromotive for the Quantum pump with canister due fuel starvation when less than 3/8 of a tank of fuel caused by the holes I drilled in the canister.

I ran the wires up the passenger side to a relay and breaker on the inside passenger fender.


Aeromotive Stealth 340lph install


Sent from my iPhone using Tapatalk
 
Here is a link to more info about the Quantum pump falling down in the canister.

Fuel pump options (stock style)

Here is a photo of both the washer that goes between(in red) and the gasket(in blue). I installed it and have had no more problems. The lid is tight going on the canister but will fit. Just make sure it is aligned correctly.

1735e0e265c212b00ccebef1778b6c0e.jpg


Sent from my iPhone using Tapatalk
 
Never like seeing one on a trailer, but at least it was an easy fix! After swallowing the tow bill...
 
Bought a vortech V3 while waiting on the input shaft to be made for the XB1A. Been working on putting an install kit together for a couple of weeks now. Finally got it all done today and cranked her up for the first time in a few weeks. Will be tuning this week..
fddaed5f3a8b94b8ce1c1ccd5d30de9d.jpg


Made this bracket to firm up the flex on the mounting bracket.
9027f5bd1aab11a032d4440dddf78d84.jpg

0520841763061b29caa90632f1ef22ca.jpg


Sent from my iPhone using Tapatalk
 
Yea I hear it’s a really nice unit. It’s a SI trim.


Sent from my iPhone using Tapatalk
 
Back
Top