
SWThomas
El Cazador
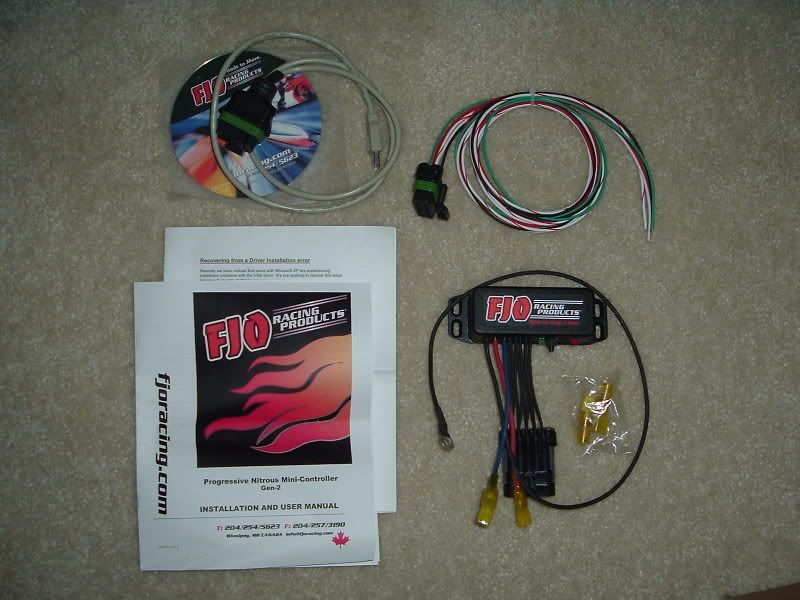
I bought an FJO Progressive Nitrous Mini Controller recently and I just got it today. I read all the instructions and installed the software and USB drivers on my laptop. I didn't know if it was going to work correctly with my Windows Vista OS, but it did. My next step is to set-up my User Data, upload it to the controller, and install the controller on my Lightning. But I have a few questions before I attempt to do this...
The following are the questions I have about setting-up the User Data before I upload it to the controller...
1. Input #2: It says in the manual that Input #2 can be used with either a 12V signal or ground signal to activate it. It also says that this input is used as a secondary arming switch for applications that use a trans-brake or clutch switch. So should I just disable this option?
2. Stage Set-Up: This seems pretty self explainatory, but I have a few questions. The RPM cutoff was already set at 6,000 when I opened the file. Should I leave it there or set it higher/lower? The RPM trigger was also pre-set and at 3,000. Should I leave it there or set it higher/lower?
3. Real Curve: Should I leave the curve the way it is with a straight line from 0% to 100% or should I tweak it? Also, what's the best curve to use? Time based or RPM based? I'm sure it's about preference, but I'd appreciate opinions.
The following are the questions I have about installing the controller on the vehicle...
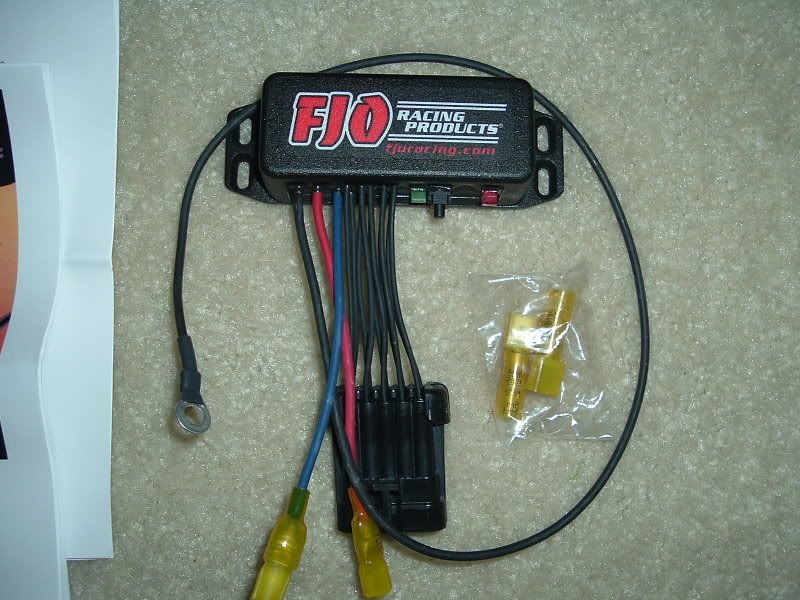
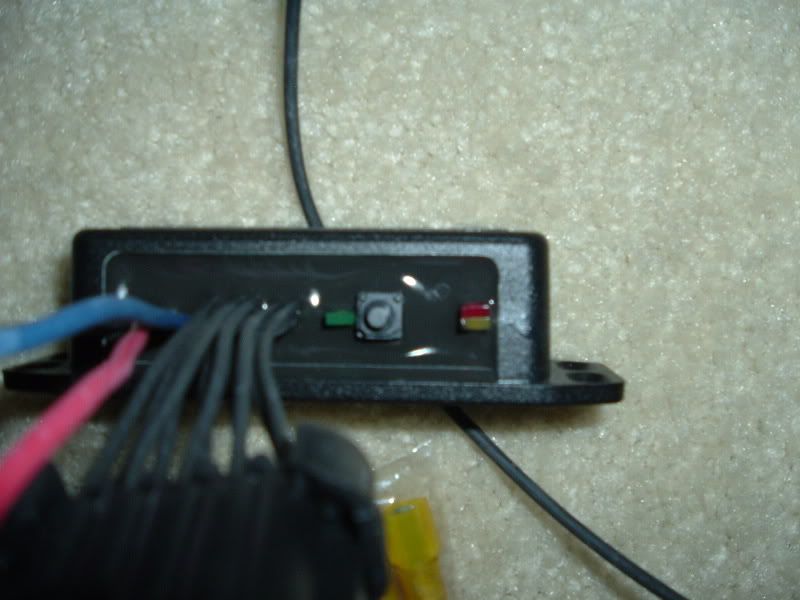
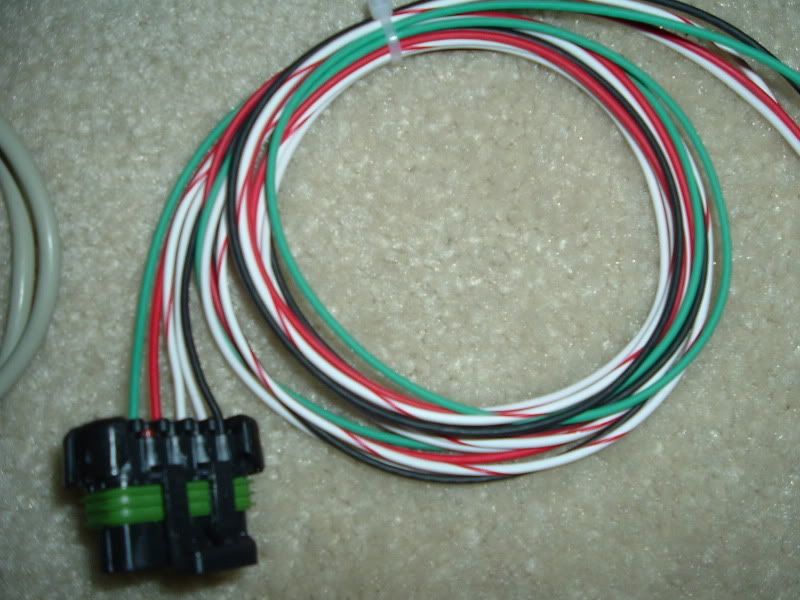
1. Grounds: I assume the large black wire on the controller (see fourth pic) is the Driver Ground because in the installation instructions it has (12 AWG black wire) after is says Driver Ground. If that's the case, where's the best place to ground this wire? It says that it should be connected to a ground location that can handle 80 AMPS. If the large black wire is the Driver Ground then that would mean that the small black wire on the weather pack connector with all the other wires would be the Controller Ground (see last pic). It says to ground this wire to a chassis ground near the battery and preferably not to the same location as the Driver Ground. Where would be a good spot for this ground? Firewall?
2. Tach Input: The green wire coming out of the male weather pack connector (see last pic) is the Tach (RPM) Input. The manual says it's designed to work with most tachometer signals (down to 3 volts). It says that it can be connected to a tach signal, coil trigger signal, or a fuel injector. It says DO NOT connect it to a high voltage wire. I think a fuel injector would be the best bet. Which injector wire should I connect it to?
3. Input #1: The white wire with the red stripe coming out of the weather pack connector is the Input #1 wire. This wire is designated to work with most TPS's. I'm not going to use a WOT switch so I need to connect this wire directly to the signal wire of the TPS. Which wire is that?
That's about all the questions I have right now. The rest of it looks pretty easy. Any tips or information about this would be greatly appreciated.
The following are the questions I have about setting-up the User Data before I upload it to the controller...
1. Input #2: It says in the manual that Input #2 can be used with either a 12V signal or ground signal to activate it. It also says that this input is used as a secondary arming switch for applications that use a trans-brake or clutch switch. So should I just disable this option?
2. Stage Set-Up: This seems pretty self explainatory, but I have a few questions. The RPM cutoff was already set at 6,000 when I opened the file. Should I leave it there or set it higher/lower? The RPM trigger was also pre-set and at 3,000. Should I leave it there or set it higher/lower?
3. Real Curve: Should I leave the curve the way it is with a straight line from 0% to 100% or should I tweak it? Also, what's the best curve to use? Time based or RPM based? I'm sure it's about preference, but I'd appreciate opinions.
The following are the questions I have about installing the controller on the vehicle...
1. Grounds: I assume the large black wire on the controller (see fourth pic) is the Driver Ground because in the installation instructions it has (12 AWG black wire) after is says Driver Ground. If that's the case, where's the best place to ground this wire? It says that it should be connected to a ground location that can handle 80 AMPS. If the large black wire is the Driver Ground then that would mean that the small black wire on the weather pack connector with all the other wires would be the Controller Ground (see last pic). It says to ground this wire to a chassis ground near the battery and preferably not to the same location as the Driver Ground. Where would be a good spot for this ground? Firewall?
2. Tach Input: The green wire coming out of the male weather pack connector (see last pic) is the Tach (RPM) Input. The manual says it's designed to work with most tachometer signals (down to 3 volts). It says that it can be connected to a tach signal, coil trigger signal, or a fuel injector. It says DO NOT connect it to a high voltage wire. I think a fuel injector would be the best bet. Which injector wire should I connect it to?
3. Input #1: The white wire with the red stripe coming out of the weather pack connector is the Input #1 wire. This wire is designated to work with most TPS's. I'm not going to use a WOT switch so I need to connect this wire directly to the signal wire of the TPS. Which wire is that?
That's about all the questions I have right now. The rest of it looks pretty easy. Any tips or information about this would be greatly appreciated.
 ldtu:
ldtu: